Master How to Write a Comic Book Script
You’ve got a character in your head, maybe a killer opening scene, maybe a whole world. You can see the cover already. Then you sit down to write and hit the wall every new comics writer hits.
What does a comic script even look like?
It’s not a screenplay. It’s not prose. It’s not storyboards. It’s a working document that has to do one job well: turn your idea into clear visual instructions without choking the life out of the art. That’s where most beginners freeze. They’re not short on imagination. They’re short on a process.
Learning how to write a comic book script gets much easier when you stop treating it like a mysterious industry ritual and start treating it like production design on paper. You’re building a blueprint for pages, panels, dialogue, emotion, and rhythm. If a human artist reads it, they should know what matters. If an AI comic generator reads it, it should have enough specificity to produce something coherent.
The fundamentals of the craft haven’t changed. The tools have. A solid comic script still starts with story logic, character movement, and page control. Modern tools just reward clarity faster.
Your Comic Idea is Great Now What
The first useful shift is simple. Don’t start by scripting page one. Start by proving your idea can survive contact with structure.
A lot of comic concepts sound strong in conversation and collapse on the page. “A retired monster hunter has to protect the child of the beast king” is a premise. It’s not a story yet. “A retired monster hunter who hates monsters must escort a monster child across enemy territory, and protecting her forces him to confront the lie that defined his whole life” is closer. That version has pressure, conflict, and change built into it.
Your job at the beginning is to answer four practical questions:
Who is this about
Pick the character whose decision-making drives the story.What do they want
Give them a concrete external goal, not a vague emotional wish.What stands in the way
Build opposition that creates scenes, not just backstory.Why does this need to be a comic
If the best moments are visual, staged, and page-turn dependent, you’re in the right medium.
A comic script isn’t a place to discover whether you have a story. It’s a place to execute one.
That’s why beginners often feel format anxiety. They think the hard part is learning PAGE 1, PANEL 1. It isn’t. The hard part is knowing what belongs on page 1 in the first place.
Start smaller than your ambition. If you’ve got a sprawling saga, reduce it to one issue, one chapter, or one complete short arc. If your idea still feels good when compressed, you’ve probably found the story engine. If it only works when explained for ten minutes, keep refining.
A workable comic idea has three traits. It creates visual moments, it forces character choices, and it can be broken into scenes. Once you have that, the script format stops feeling intimidating. It becomes useful.
From Big Idea to Solid Story Outline
Writers skip outlining because they want momentum. Then they lose weeks fixing avoidable problems. In comics, that gets expensive fast because every weak scene eventually becomes a bad page request.
A strong outline is not bureaucracy. It’s the document that protects your pacing, your character arc, and your artist’s time.
In professional workflows, a complete outline represents 20 to 30% of the final book’s page count, and the three-act model breaks into 25% setup, 50% confrontation, and 25% resolution, a structure used in approximately 85% of published works according to comic writing fundamentals summarized here. Those numbers matter because they remind you that structure is part of the work, not a detour from it.
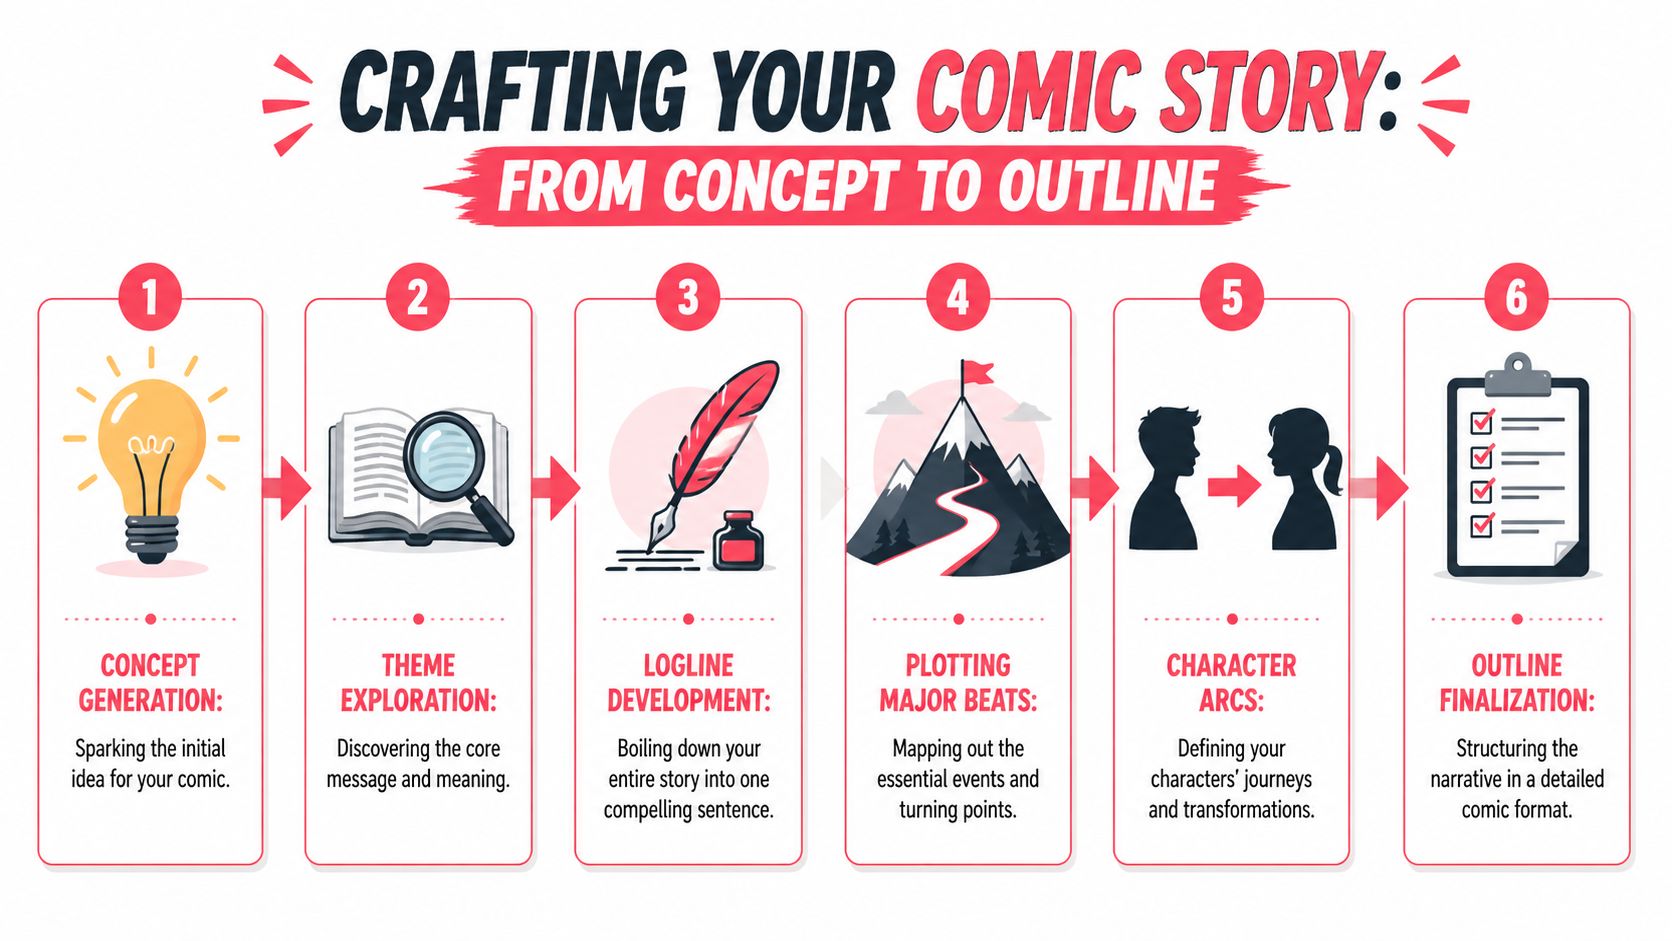
Start with the logline and theme
Your logline is the pressure-tested version of the idea. One sentence. Character, goal, obstacle, stakes.
Bad logline: A young hero discovers hidden powers in a dangerous city.
Better logline: A courier who can briefly stop time must cross a city under martial law to deliver evidence that could expose the regime, before her power kills her.
That sentence gives you scenes. Chases. Reveals. Choices. Deadlines.
Then lock the theme. Not for marketing copy. For decision-making. Theme tells you what the story is arguing. Maybe it’s “control destroys intimacy” or “mercy takes more courage than vengeance.” When two possible scenes compete for space, the theme tells you which one belongs.
Build character arcs before plot detail
Comics forgive many things. They don’t forgive flat protagonists for long.
Write one paragraph each for your lead, your main opposition, and the key supporting cast. Focus on movement, not biography.
Ask these questions:
- What does this character believe at the start
- What event challenges that belief
- What choice proves they’ve changed, or failed to
A useful shortcut is to pair the external plot with an internal contradiction. If your hero is brave in battle but cowardly in relationships, dialogue scenes start carrying weight. If your villain sincerely believes order justifies cruelty, conflict gets sharper than “bad guy wants power.”
Practical rule: If your protagonist could make the same choices in every scene without changing, the outline isn’t ready.
Plot the major beats, not every camera angle
Outlining a comic is not drawing invisible panels in prose. Stay at the scene and beat level first.
A clean approach looks like this:
Opening disruption
Show the status quo, then break it fast.Commitment point
Force the lead to accept the central problem.Escalation cycle
Each major sequence should worsen the situation or complicate the goal.Crisis choice
Corner the character so values and survival collide.Resolution with consequence
End the plot, then show the cost of ending it.
For a single issue, keep scenes purposeful and distinct. If two scenes do the same job, merge them. If a scene delivers information without changing anything, cut it or redesign it.
Turn the outline into scene cards
At this point, the story becomes scriptable.
Create a list of scenes and give each one four lines:
| Scene element | What to write |
|---|---|
| Location | Where it happens and what visual flavor it offers |
| Purpose | What changes because of this scene |
| Conflict | Who wants what, right now |
| Exit beat | The image, reveal, or decision that propels the next scene |
That last line matters. Comics live on transitions. If your scene endings are weak, the pages will feel flat even when the art is good.
Here’s a simple scene card example:
- Location: Rooftop greenhouse above a flooded market
- Purpose: Hero learns the missing scientist left willingly
- Conflict: Mentor wants to protect the truth, hero wants answers
- Exit beat: A hidden radio activates with the scientist’s voice
That’s enough to script later without wandering.
Know when your outline is detailed enough
Beginners often stop too early. “I know the story in my head” is not an outline. If the emotional turns, reveals, and scene objectives aren’t on the page, you’ll discover missing logic while scripting. That’s the worst time to discover it.
A solid outline lets you answer these without hesitation:
- What changes in every scene
- Where the midpoint shift happens
- Why the climax belongs to this protagonist
- What visual set pieces the story depends on
- What information must be delayed for impact
If you can answer those, the script becomes execution instead of rescue work.
The Anatomy of a Comic Book Script
Comic script format looks strange until you realize what it’s doing. It separates page flow, panel action, and text so the artist, letterer, and editor can all find what they need fast.
You don’t need specialty software to do this well. A clean document in Word or Google Docs works fine. What matters is consistency.
There’s also no universal template, which surprises new writers. That’s normal. The common thread is clarity: label the page, label the panel, describe what must be seen, then attach only the text that belongs in that panel.
The core elements on the page
Here’s the basic working structure most beginners should use:
| Element | Example | Purpose |
|---|---|---|
| Page | PAGE 3 | Marks where the physical page begins and helps control pacing |
| Panel | Panel 1 | Breaks the page into visual beats |
| Action description | Rain lashes the alley. Mara crouches behind a dumpster, one hand over a bleeding side. | Tells the artist what the reader must see |
| Character cue | MARA | Identifies the speaker for lettering and readability |
| Dialogue | I said stay down. | Supplies spoken text inside balloons |
| Caption | Three minutes earlier. | Delivers narration, time shifts, or interior framing |
| SFX | KRAKK | Indicates a sound effect that should appear in the art |
The script is not prose fiction. You are not writing what cannot be drawn. “She remembers her lonely childhood unless someone asks” is a note for you, not a panel description. “She pauses at the family photo, thumb covering one face” is scriptable.
A copyable sample page
Use a plain, readable format like this:
PAGE 1
Panel 1
Wide shot. A city bus hangs half off a collapsed bridge at dusk. Commuters crowd the windows in panic below. On the roadway, ISA runs toward the bus against the flow of fleeing traffic.
CAPTION: Harbor District. 6:12 PM.
Panel 2
Medium shot. Isa plants her feet, terrified but focused. She reaches both hands toward the bus.
ISA: Nobody move!
Panel 3
Close on the bus frame groaning under strain.
SFX: KRRNNK
That’s enough to create the moment. It gives the artist the essential visual, gives the letterer the text, and leaves room for staging choices.
What to describe and what to leave open
Many scripts falter. New writers either under-describe or over-direct.
Under-description sounds like this: “Fight scene. It’s epic.”
Over-direction sounds like this: “Low angle from behind the left boot, lens compressed, three-quarter profile, camera cants six degrees as debris arcs diagonally.”
Unless the angle is story-critical, don’t micromanage.
Use this test:
Specify what changes story meaning
If the panel must hide a weapon, reveal a reaction, or show distance between characters, say so.Leave performance space
If the exact hand placement or lens feel isn’t essential, let the artist solve it.Write for readability
Dense paragraphs slow everyone down.
The best script note often describes intent, not choreography.
For deeper examples of longer-form scripting choices, this guide on how to write a graphic novel script is useful as a companion read once you’ve got the basic page format under control.
A simple formatting standard that works
If you want a reliable default, use these habits:
- Bold your page and panel labels so navigation is easy
- Keep panel descriptions visual and present tense
- Separate dialogue from description with line breaks
- Name characters consistently from the first appearance
- Avoid giant paragraphs that bury the actual panel action
Formatting won’t make a weak story strong. But messy formatting can make a strong story hard to draw. That’s reason enough to take it seriously.
Directing on the Page with Panels and Pacing
The moment you start scripting panels, you stop being only a writer. You become a director of attention.
The reader doesn’t experience your comic as plot summary. They experience it panel by panel, reveal by reveal, page by page. Your script controls that sequence long before the art exists.
A standard 22-page issue typically contains around 132 panels, averaging 6 panels per page, and 90% of scripts adhere to a 5 to 7 panel per page structure to maintain readable flow, according to this breakdown of professional comic scripting practice. That doesn’t mean every page should look identical. It means you start from a readable baseline, then bend it on purpose.
One scene, two pacing choices
Take a simple moment. A detective opens an apartment door and finds her missing brother inside, alive.
You can script that scene as a slow emotional reveal or a quick shock beat.
Slow version
- Panel 1. Detective at the door, key trembling
- Panel 2. Lock turning
- Panel 3. Door opening a crack
- Panel 4. Her eye widening
- Panel 5. Interior silhouette on a chair
- Panel 6. Full reveal of the brother
That version stretches tension. The reader leans forward.
Fast version
- Panel 1. Detective kicks open the door
- Panel 2. Her brother sits inside, waiting in the dark
- Panel 3. Close on her stunned reaction
Same information. Very different experience.
That’s pacing. Not speed in the abstract, but the controlled release of information.
Use panels as beats, not containers
A weak script treats panels like boxes to fill with facts. A strong script treats each panel as a beat in the reader’s emotional progression.
Ask of every panel:
- What is the new information
- What is the emotional turn
- Why is this a separate image
If you can combine two actions without losing impact, do it. If one action deserves emphasis, isolate it.
A common beginner mistake is stacking too many actions into one panel description. “She bursts through the window, rolls across the desk, grabs the file, and fires at the guard” is not one moment. It’s several. Break it apart and the scene becomes legible.
Page turns are part of the script
Comics have a weapon prose doesn’t have: the page turn reveal.
If a reveal matters, place it so the reader encounters it only after turning the page. That can be a monster, a kiss, a death, a citywide catastrophe, or a simple but devastating line of dialogue paired with an image.
A useful habit is to look at the final panel on each page and ask whether it creates pull. If the answer is no, the next page has to work harder than it should.
Save your best surprise for the image that the reader cannot see yet.
How to vary panel density without losing control
Start from your default rhythm, then deviate with intent.
Use more panels when you want:
- Tension through incremental action
- Comedy through reaction timing
- Process such as opening a safe, mixing a serum, assembling a disguise
- Subjectivity when a character notices tiny details under stress
Use fewer panels when you want:
- Impact from a large image
- Clarity in action scenes
- Scale for environments, creatures, destruction, spectacle
- Pause so a single emotional image lands
The trick is not to “make it cinematic” by making everything wide and sparse. The trick is contrast. A quiet six-panel conversation can make a sudden full-width action beat feel explosive.
Think in reads, not just visuals
A panel isn’t only drawn. It’s read. Balloon placement, caption load, and visual complexity all affect pace.
A dense panel with two balloons, background action, and three visible characters reads slower than a silent close-up. That means pacing is not just panel count. It’s information load.
When I’m troubleshooting a page, I ask where the eye goes first, second, and third. If that path feels muddy in script form, it usually gets worse in art.
A practical page breakdown method
Try scripting pages in passes:
- Beat pass
Write only the core action for each panel. - Visual pass
Clarify what must be visible. - Text pass
Add dialogue, captions, and sound effects. - Pacing pass
Cut, combine, or expand panels for rhythm.
This keeps you from solving everything at once. It also reveals when a page is carrying too many jobs.
If you remember only one thing here, remember this: every page teaches the reader how to read the next page. Clean pacing builds trust. Confused pacing breaks it.
Writing Lean Dialogue and Effective Captions
Comics punish verbal indulgence faster than most forms. The page has limited space, the image is already carrying meaning, and every extra line competes with the art.
That’s why I push beginners toward restraint early. Not because sparse dialogue is automatically superior, but because overwritten dialogue is the fastest way to flatten a scene that should feel alive.
For readability, dialogue in a single speech balloon should not exceed 25 words, and 80% of artists prefer scripts that provide mood and emotional cues over micromanagement, while artists are responsible for 60 to 70% of the final visual storytelling, according to SFWA’s discussion of comic scripting practice. Those limits are practical. They force better choices.
Why less text usually creates more power
A beginner often writes the line a character would say in a novel. Comics need the line the reader can absorb in motion.
Consider this overwritten version:
MARA: I just think it’s interesting that after all these years you suddenly decide to come back now, when everything is falling apart and when your absence is one of the reasons this family ended up broken in the first place.
That may be emotionally accurate. It’s terrible for the panel.
Now trim it:
MARA: You don’t get to come back for the ruins.
The shorter line leaves room for the drawing to finish the thought. Her expression, posture, and the other character’s reaction do the rest.
Good comic dialogue doesn’t explain the feeling if the panel can show it.
Make every line do at least two jobs
A strong line in comics should usually do more than one thing. It can reveal character while moving conflict. It can clarify plot while sharpening voice. It can expose vulnerability while setting up the next beat.
Here’s a useful filter for any line of dialogue:
- Does it sound like this character
- Does it change the scene
- Would the panel still work if I cut it
If the answer to the third question is yes, cut it and see if the scene improves.
Captions should frame, not duplicate
Captions are useful. They can handle time jumps, inner conflict, irony, and narrative framing. They become dead weight when they repeat what the art already says.
Weak caption:
CAPTION: Mara is angry as she storms into the room.
If the panel already shows Mara kicking the door open with murder in her eyes, that caption is wasting space.
Better uses for captions include:
- Time and place shifts when needed for clarity
- Interior narration that contrasts with visible behavior
- Documentary or noir framing when voice is part of the experience
- Controlled exposition that the scene cannot carry naturally
Captions work best when they add a second layer, not a duplicate layer.
Mood beats matter more than over-description
Writers sometimes compensate for weak dialogue by over-directing the acting. That creates bloated panel descriptions and still doesn’t fix the scene.
Instead of writing a paragraph about eyebrow tension, hand motion, exact posture, and head angle, write the emotional instruction that matters.
Try this:
Bad note
She frowns slightly, raises her left eyebrow, glances down for half a second, then turns away while folding both arms tightly.Better note
She’s trying to look unimpressed, but the question got under her skin.
That gives the artist something playable.
A quick dialogue tightening pass
When revising text, do this in order:
- Cut greetings and throat-clearing
- Replace explanation with implication
- Split long speeches into interactive beats
- Give the key line its own clean landing spot
- Read every line aloud
If it sounds written, it probably is.
A comic page doesn’t need more words. It needs the right words, in the right amount, attached to the right image.
Revising Your Script and Prepping for AI Generation
First drafts usually prove the story exists. Revision makes the script usable.
When you revise for a human collaborator, you’re asking, “Can an artist stage this clearly?” When you revise for an AI workflow, you ask a second question: “Have I converted artistic intention into explicit visual inputs?”
Those are related skills, but they’re not identical.
The revision pass that matters most
Before touching wording, check page logic.
Read the script while looking only at panel descriptions. Ignore dialogue. The action should still track. You should know where characters are, what changes, and why each panel exists.
Then do a second pass focused on friction points:
Unclear staging
If two people move across a room, can the reader follow who is where?Bloated panels
If a single panel contains too many actions, split it.Repeated information
If dialogue says what the image already says, cut the text.Weak page endings
If the last panel of a page doesn’t create momentum, redesign it.
A useful final check is to imagine an artist emailing back one question per page. Which pages would trigger confusion? Fix those first.
Revision in comics is often less about prettier sentences and more about cleaner decisions.
Preparing a traditional script for AI
AI comic generation rewards specificity differently than a human artist does.
A human artist can infer a lot from tone, genre familiarity, and subtext. AI tools usually need cleaner visible signals. If your script says “she looks conflicted,” a human artist might stage a great expression. An AI tool often benefits from a more concrete visual instruction such as “she forces a smile while gripping the torn letter behind her back.”
That doesn’t mean you should write robotic prompts instead of a script. It means you should create an AI-ready pass after the normal revision.
In that pass, strengthen these elements:
Character identifiers
Keep visual traits consistent across scenes. Hair, clothing silhouette, age impression, and key accessories should stay stable.Environment clarity
Name the visible setting features that define the scene. Not every detail, just the anchors.Action readability
Favor one clear action per panel.Emotion in visible terms
Write what the face, body, or gesture is doing.Shot priority
State what the panel is really about. If it’s a reaction shot, say that.
If you’re exploring AI-assisted comic workflows, this overview of an AI book maker gives a useful sense of how structured inputs translate into generated pages.
Human-first script, AI-ready layer
The strongest approach is not choosing one method over the other. It’s writing a script that works for a human artist first, then adding a second layer of specificity for generation tools.
A practical example:
Human-first panel description
Jon stands alone in the wrecked chapel, ashamed but defiant.
AI-ready version
Inside a wrecked stone chapel at night. Broken pews, moonlight through a damaged stained-glass window. Jon stands at the altar in a torn black coat, jaw clenched, shoulders tense, trying to hide shame behind a defiant stare.
Same moment. The second version gives a generator clearer visual handles.
That's the bridge between traditional craft and newer tools. Strong comic writing still depends on scene purpose, panel logic, and emotional control. AI just exposes weak visual thinking faster.
Start Creating Your Comic Today
Writing comics feels complicated until you break it into its real parts: story, outline, page, panel, text, revision. None of those pieces are mystical. They’re learnable. If you can think in scenes and make choices about what the reader sees next, you can learn how to write a comic book script.
Start with one short project. Finish it. Format it cleanly. Revise it like someone else has to draw it. That alone will teach you more than months of circling the idea.
If you want more inspiration on turning ideas into finished pages, this guide on how to make a comic is a good next step.
If you want to turn your script, photos, or story concept into finished comic pages without drawing everything by hand, PersonalizedComics is a practical way to do it. You can choose from eight art styles, turn real people into comic characters, generate pages with panels, dialogue, narration, and sound effects, and even order a physical copy when you’re done. It’s a good fit for hobbyists, gift makers, and writers who want to prototype a comic fast.