Master How To Draw Comic Characters
You’ve probably done this before. You get an idea for a character, maybe a masked vigilante, a goofy sidekick, or a hero based on your best friend, and then you sit down to draw. A few lines in, the pose feels stiff, the face looks off, and the character in your head refuses to show up on the page.
That frustration is normal. Learning how to draw comic characters isn’t about magically drawing well on day one. It’s about building a character in layers. Gesture first. Structure next. Personality after that.
It’s also a good time to learn. The digital comic industry is projected to grow by 10.9% between 2025 and 2026, and digital drawing adoption among artists surged by 12.9% in a single year, according to digital comic market statistics collected here. More artists are making comics digitally, and more readers are finding stories on screens.
That matters because there are now two valid ways to bring a comic character to life.
One path is the classic one. Pencil, tablet, sketchbook, anatomy studies, lots of awkward drawings, and gradual improvement. The other path uses newer tools that can turn photos and ideas into comic-style characters without requiring years of figure drawing practice.
Both paths can lead to the same outcome. A character that feels alive.
Unleashing Your Inner Comic Artist
Most beginners think comic art starts with details. Cool armor. Sharp jawline. Wild hair. A giant sword. It doesn’t. It starts with a simple question.
Who is this person?
A comic character becomes interesting when the drawing and the idea support each other. If your character is nervous, the shoulders might rise. If they’re arrogant, the chin might tilt up. If they solve problems with speed, the design should feel light and fast.
Start with the story, not the costume
Before you draw, write down a few plain-language notes:
- What do they want: revenge, justice, approval, freedom, money, peace
- What makes life hard for them: fear, weakness, bad temper, duty, secrecy
- How do they move: heavy, graceful, twitchy, calm, explosive
- What should a reader notice first: size, silhouette, expression, weapon, outfit
Those notes act like rails. They keep you from drawing random cool stuff that doesn’t belong together.
Practical rule: If you can describe your character in one sentence, you can usually draw them more clearly.
For example, “A tired paramedic who becomes a street-level hero at night” gives you more visual direction than “a badass superhero.” You can already imagine practical boots, medical tape on the knuckles, maybe under-eye shadows, maybe a posture that says this person never gets enough sleep.
Your first drawings don’t need to be impressive
A lot of readers freeze because they think every sketch has to look publishable. That’s the wrong standard. Early sketches are for discovery.
Try this on your next page:
- Draw three tiny versions of the same character.
- Change only the body type in each one.
- Then draw three head shapes.
- Then test three outfit directions.
That small exercise teaches an important lesson. Character design is often a process of choosing, not guessing.
There isn’t one “real” way anymore
Some people want to master anatomy and draft every figure themselves. Others want to tell stories, make gifts, or prototype pages without spending years learning to draw. Both motivations are valid.
That shift matters because comic creation no longer belongs only to trained illustrators. More people can participate now. Some will use gesture drawing and construction lines. Others will start from photos, prompts, and style references, then refine from there.
What matters most is that your idea leaves your head and becomes visible.
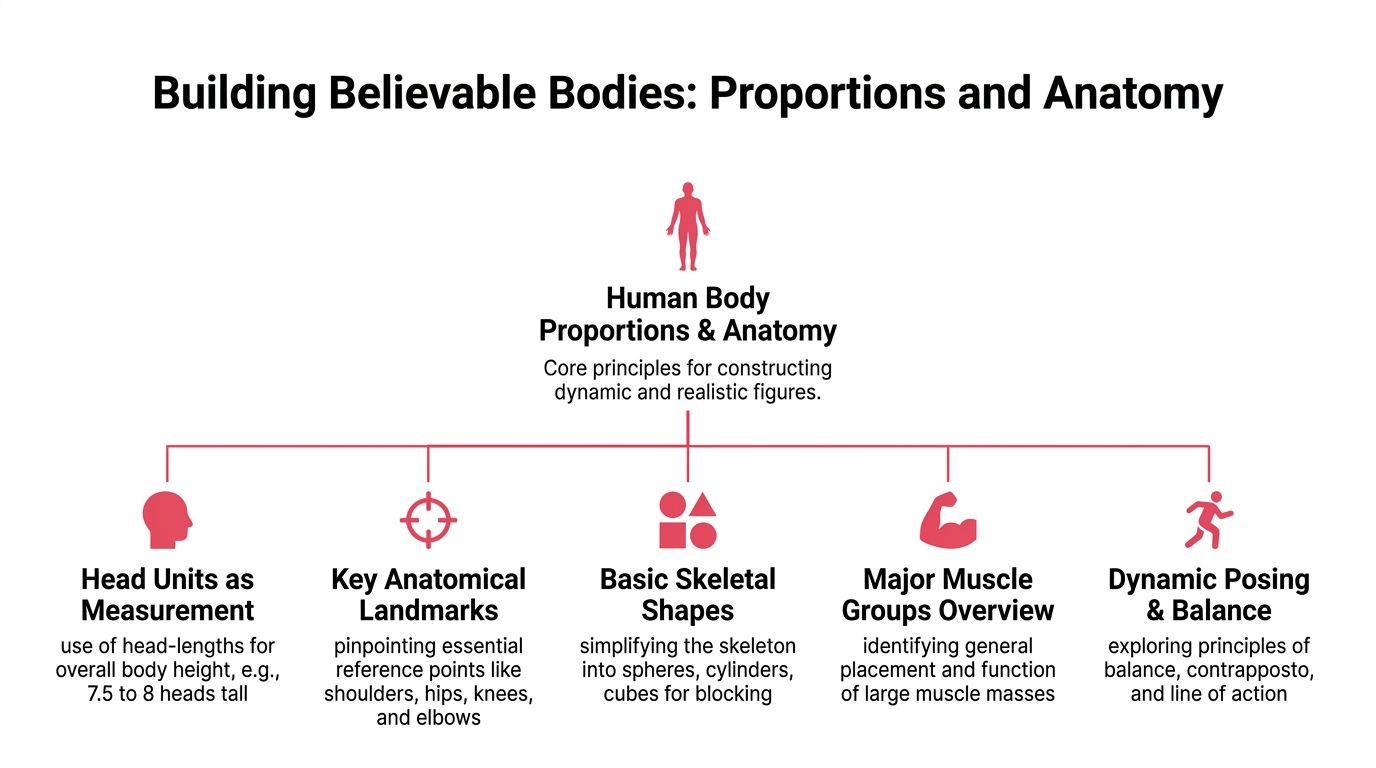
Building Believable Bodies Proportions and Anatomy
If a character’s body feels wrong, readers notice it even when they can’t explain why. The fix usually isn’t “learn every muscle.” The fix is simpler. Build the figure in the right order.
Start with motion. Then proportion. Then volume.
Begin with gesture, not outlines
A stiff comic figure usually comes from drawing the contour too early. Beginners often trace the outside shape of the body before they understand the action inside it.
Use a loose line of action first. Think of the spine as the main energy path. A punch might use a bold curve. A relaxed standing pose might use a softer S-curve. These simple curves help you capture movement before anatomy complicates everything.
The method described in this comic figure drawing breakdown starts with fluid C and S curves and then builds the body on top. That same source notes that expert-level comic art often begins with the 8-heads-tall heroic figure standard, and 85% of comic pros adhere to it for consistency across panels.
That number matters less as a rule you must obey and more as proof that pros rely on repeatable structure.
Use the 8-heads-tall standard
The 8-heads-tall method gives you a measuring system. Instead of guessing where the knees or pelvis should go, you divide the body into head-length units.
A simplified version looks like this:
| Body area | Approximate placement in head units |
|---|---|
| Head | 1 |
| Chin to chest | 1 |
| Chest to navel | 1 |
| Navel to crotch | 1 |
| Crotch to mid-thigh | 1 |
| Mid-thigh to knee | 1 |
| Knee to mid-shin | 1 |
| Mid-shin to feet | 1 |
This doesn’t mean every character must look heroic. It means you need a baseline before you stylize. Once you understand the standard, you can shorten the legs for a cartoon sidekick, enlarge the torso for a bruiser, or push the head size for a younger look.
Build the body from simple forms
Don’t jump straight from stick figure to finished anatomy. Add 3D forms first.
Think in these building blocks:
- Ribcage: an egg or barrel
- Pelvis: a tilted box
- Arms and legs: cylinders
- Shoulders and joints: spheres or simple caps
- Hands and feet: wedges at first, details later
Many artists improve fast when they apply this principle. Once you stop drawing “an arm” and start drawing a cylinder turning in space, poses become easier to rotate.
If you want to see how different comic styles handle proportion and shape language, this gallery of comic book style artwork examples is useful for comparing exaggeration, silhouette, and finish.
Your character doesn’t need perfect anatomy. Your character needs anatomy that feels solid enough to hold the pose.
Landmarks keep the figure grounded
You don’t need a medical textbook. You need landmarks you can place repeatedly.
Focus on these first:
- Shoulder line and hip line: They tell you twist and balance.
- Elbows: They usually align around the waist area.
- Knees: They should sit clearly between thigh and shin segments.
- Hands: Even rough block hands help show scale.
- Neck placement: Don’t stick it on the front of the chest. It rises from the upper torso.
A common beginner problem is “floating parts.” The torso faces one way, the hips face another, and the limbs don’t connect convincingly. Landmarks solve that.
Draw weight, not just shape
Comic characters need balance, even in exaggerated poses. If a character leans far forward, something has to counter that. A leg plants wider. The spine curves. The arms shift.
Try this exercise:
- Draw a standing figure with both feet flat.
- Move the hips to one side.
- Tilt the shoulders the opposite way.
- Notice how the body starts to feel alive.
That gentle opposition creates natural rhythm. It also helps you avoid mannequin stiffness.
Make anatomy serve the pose
A lot of beginners overrender muscles too early. They draw abs, deltoids, and forearms on a body that still has weak structure. Don’t decorate a broken frame.
Work in this order instead:
- Gesture
- Proportion
- Simple volumes
- Landmarks
- Major anatomy
- Costume and details
If the figure works at step three, the rest is much easier.
Drawing Faces That Tell a Story
A body can sell action. A face sells emotion.
Readers will forgive a simplified nose or stylized ears. They won’t forgive a blank expression in an important scene. If you want to know how to draw comic characters that connect with people, study faces as carefully as fists and capes.
Build the head like a solid object
Don’t treat the head like a flat symbol. Build it as a form in space.
A simple method works well:
- Start with a ball or sphere.
- Add the jaw as a side plane and lower face.
- Draw a center line that wraps around the form.
- Add an eye line across the head to show tilt.
Those guide lines matter. They tell you whether the character is looking up, down, or to the side. Without them, features drift and the face looks pasted on.
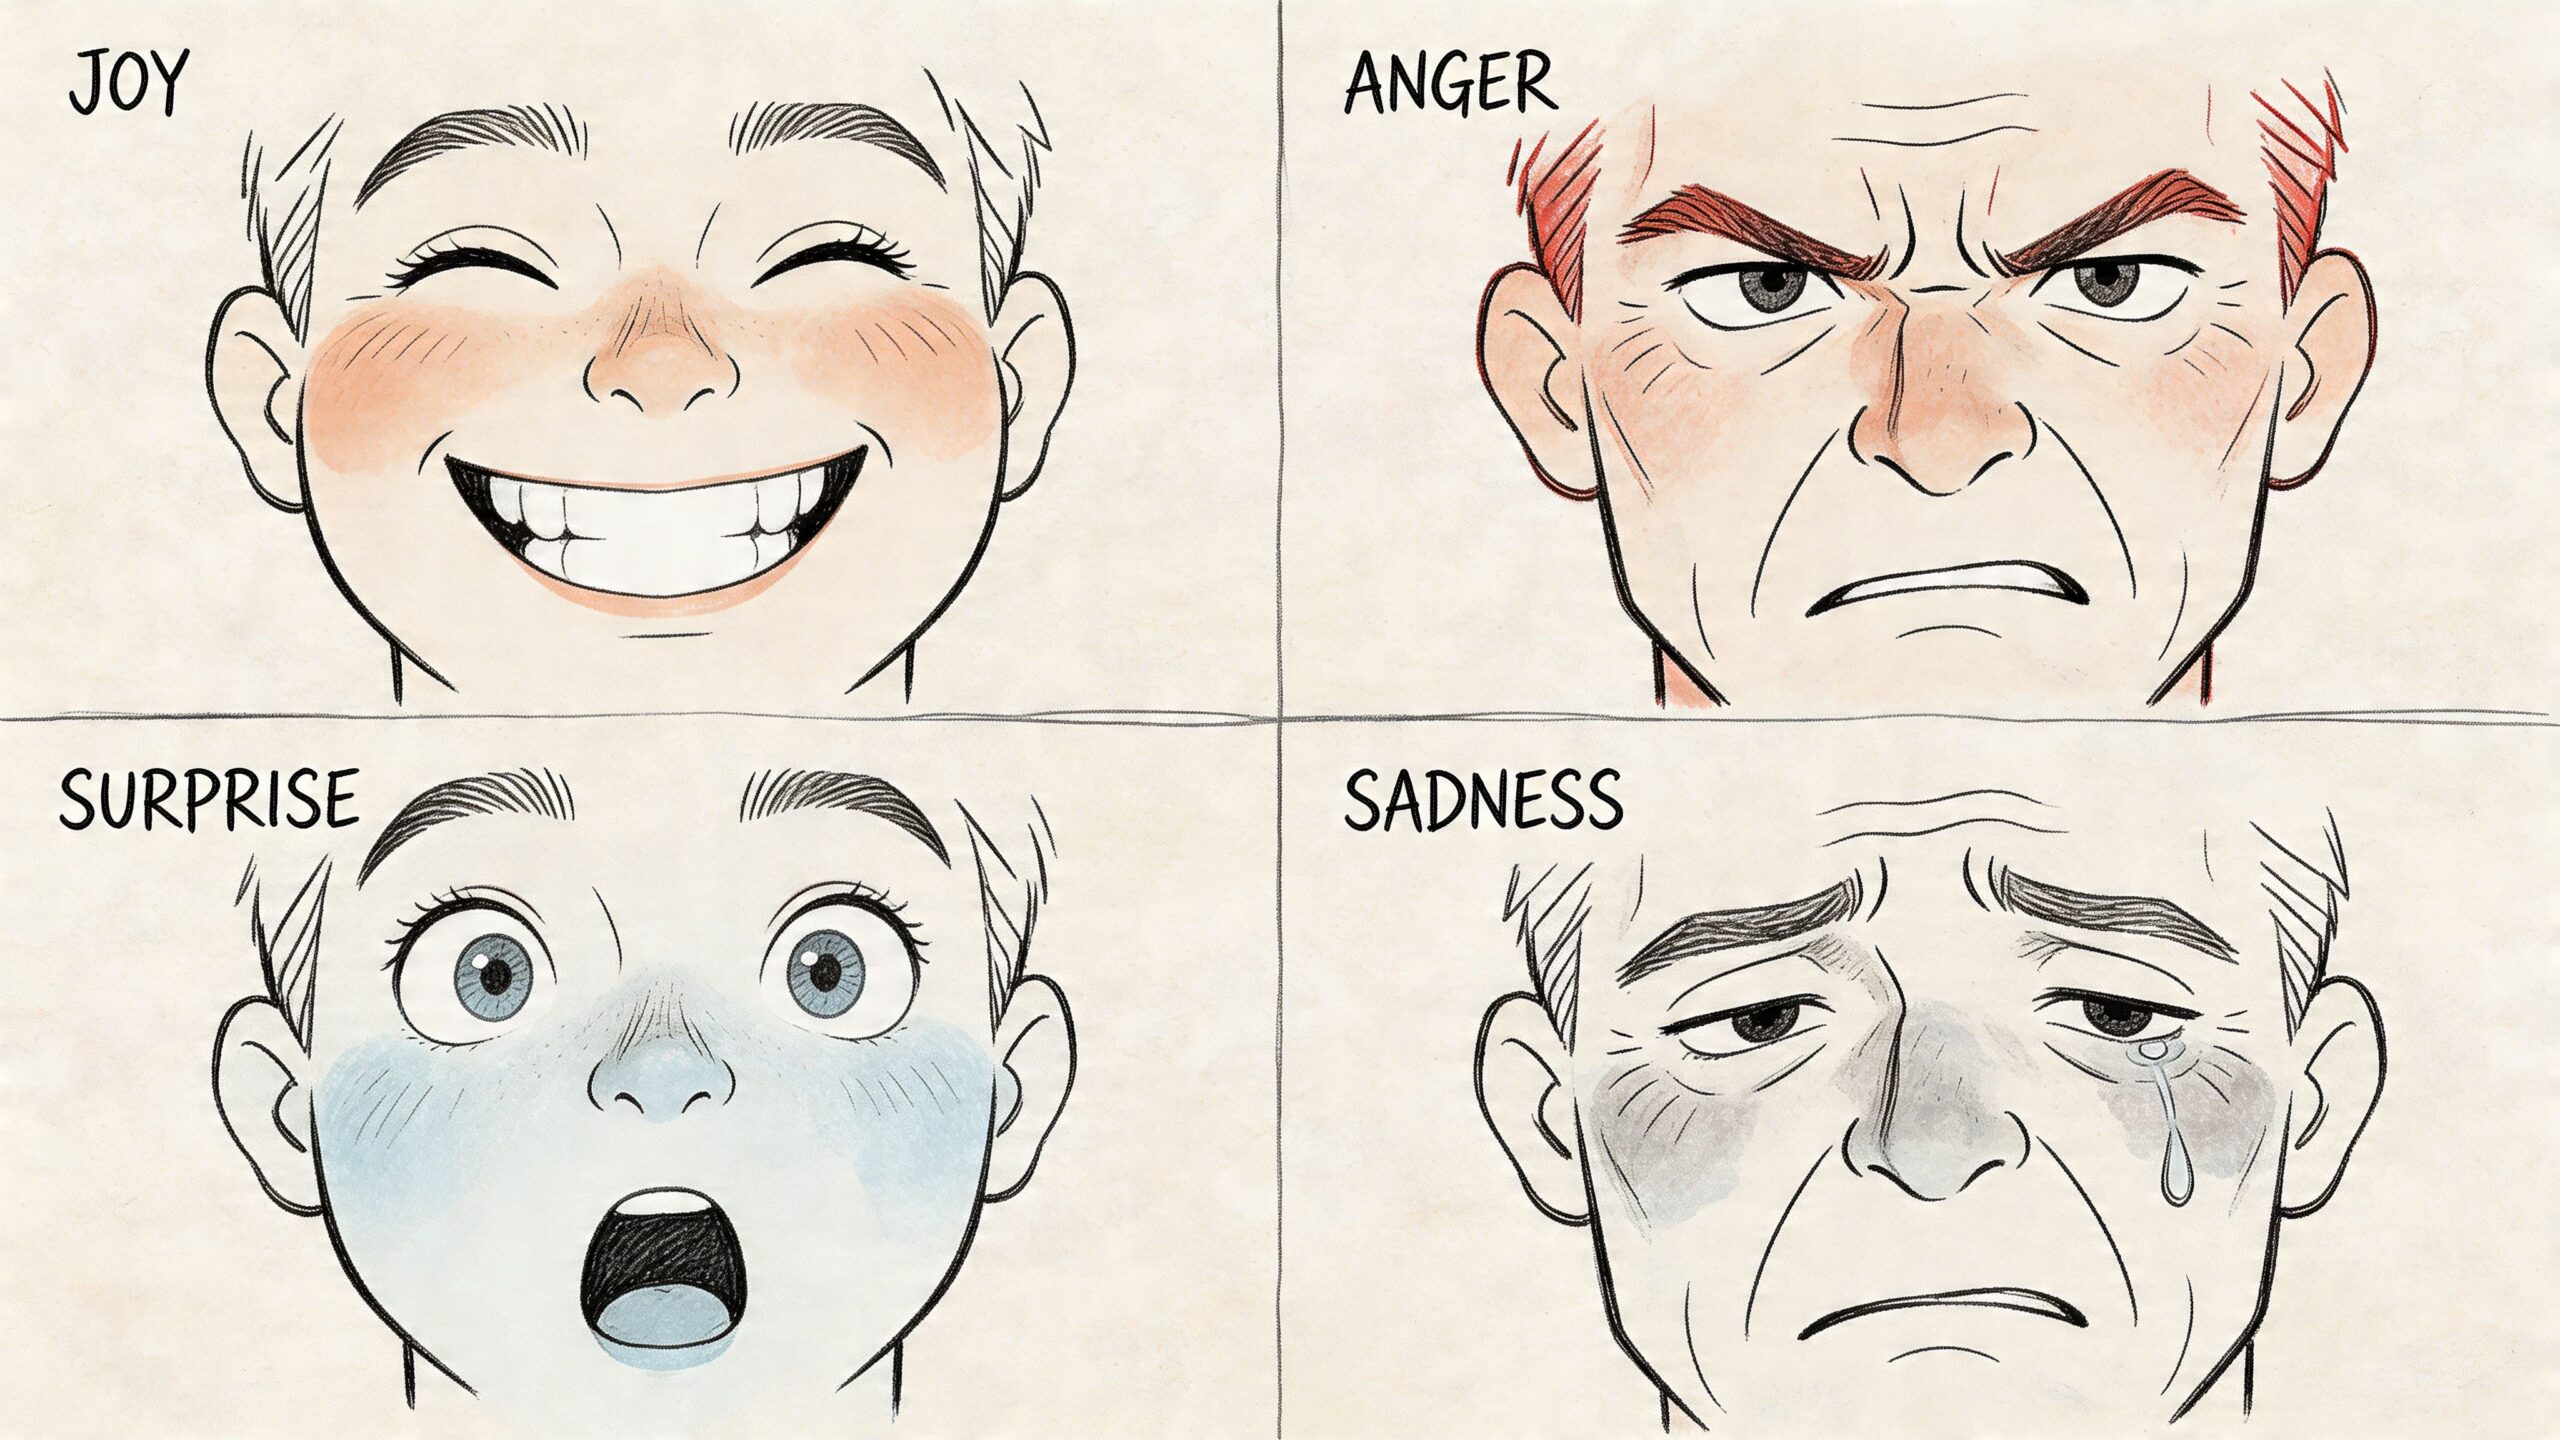
Use the eyebrows first
When beginners try to draw emotion, they often overwork the mouth and forget the brow. But eyebrows do a huge amount of storytelling.
Think of them this way:
- Raised and curved: open, worried, surprised
- Lowered and angled inward: angry, intense, determined
- Tilted upward in the middle: sad, pleading
- One brow lifted: skeptical, amused, confident
The eyes support the emotion, but the brows often lead it.
Quick check: Cover the mouth with your hand. If the emotion still reads, your eyebrows and eyes are doing their job.
The six expressions are really combinations
Joy, sadness, anger, fear, surprise, and disgust aren’t separate tricks. They’re combinations of tension in the brows, eyelids, cheeks, and mouth.
Here’s a simple way to think about them:
| Expression | What changes most |
|---|---|
| Joy | Cheeks lift, eyes narrow slightly, mouth opens or curves upward |
| Sadness | Upper lids droop, inner brows rise, mouth softens downward |
| Anger | Brows lower, eyes narrow, jaw tightens, mouth presses or snarls |
| Fear | Eyes widen, brows lift and pull together, mouth opens with tension |
| Surprise | Brows rise, eyes open wide, mouth opens more loosely |
| Disgust | Nose wrinkles, upper lip lifts, brows may tighten unevenly |
A common mistake is making every expression use a wide open mouth. Real emotion is more specific than that.
Character faces need design, not just accuracy
A comic face should still look like the same person in every mood. That comes from stable design choices.
Keep a few features consistent:
- head shape
- nose length or shape
- eye spacing
- lip fullness
- chin type
- hairline
If your angry face suddenly has different eyes, a different jaw, and a different nose, you didn’t draw an angry version of the character. You drew someone else.
Try an expression sheet
This is one of the fastest ways to improve.
Draw the same head six times. Keep the structure and angle similar. Change only the expression. That isolates the emotional mechanics and helps you notice which features you keep losing.
If your faces always look stiff, reduce detail and exaggerate the major changes more. Comics often reward clarity more than subtle realism.
Crafting Memorable Character Designs
Drawing a person and designing a character aren’t the same skill. You can draw anatomy well and still end up with a forgettable hero. Good character design answers a different question.
Would I recognize this character in shadow, in motion, or from one panel across the page?
Silhouette does the heavy lifting
If you fill your character with solid black and remove all internal details, they should still feel distinct.
A broad-shouldered tank, a narrow acrobat, and a hunched inventor should not share the same outer shape. Silhouette helps readers identify characters fast, especially in action scenes.
Look at these contrast points:
- wide vs narrow
- tall vs compact
- smooth curves vs sharp angles
- heavy coat vs fitted suit
- giant weapon vs small precise tool
Costume should reveal the role
Good costume design isn’t random decoration. It tells the reader what kind of world the character belongs to and how they move through it.
A few examples:
- A street hero might wear reinforced everyday clothing.
- A cosmic warrior can carry more ornament and symmetry.
- A stealth character benefits from cleaner shapes and less visual noise.
- A comic relief character can handle proportion shifts and more playful accessories.
Ask practical questions. Where do they keep gear? Can they run in this outfit? Would they choose to wear this?
The best costumes look inevitable. Once you see them, you can’t imagine the character dressed another way.
Color and value shape first impressions
Even if you draw in black and white, think in value groups. If you color your work, think in mood.
Here’s a simple comparison:
| Style | Line Work | Proportions | Color & Shading | Overall Vibe |
|---|---|---|---|---|
| American superhero | Bold, varied line weight | Heroic, often 8-heads-tall or more | Strong contrasts, dramatic lighting | Energetic, iconic |
| Manga-inspired | Cleaner or more selective lines | Flexible, from realistic to stylized | Screen-tone feel or simplified color blocks | Emotional, dynamic |
| Noir | Heavy shadows, graphic blacks | Realistic to slightly exaggerated | Limited palette or stark monochrome | Moody, tense |
| Fantasy | Decorative lines and costume detail | Can range from elegant to rugged | Rich palettes, atmospheric shading | Epic, immersive |
| Retro pop | Clean shapes, punchy outlines | Simplified and readable | Bright flat colors | Playful, bold |
Limit your palette early. Too many colors make a design muddy. One dominant color, one support color, and one accent often creates a cleaner read than trying to use everything at once.
Design for the audience you want
Audience matters. The action genre accounts for 34.4% of total digital comic market engagement, and over 75% of active webtoon consumers fall within the 18 to 34 age bracket, according to this reader engagement report.
That doesn’t mean every character should carry a sword and leap off rooftops. It means readers respond strongly to designs that read clearly in motion. Dynamic silhouettes, expressive poses, and outfits that support action all help.
If you’re designing for romance, comedy, slice-of-life, or horror, the same principle applies. Build for the emotional experience the reader came for.
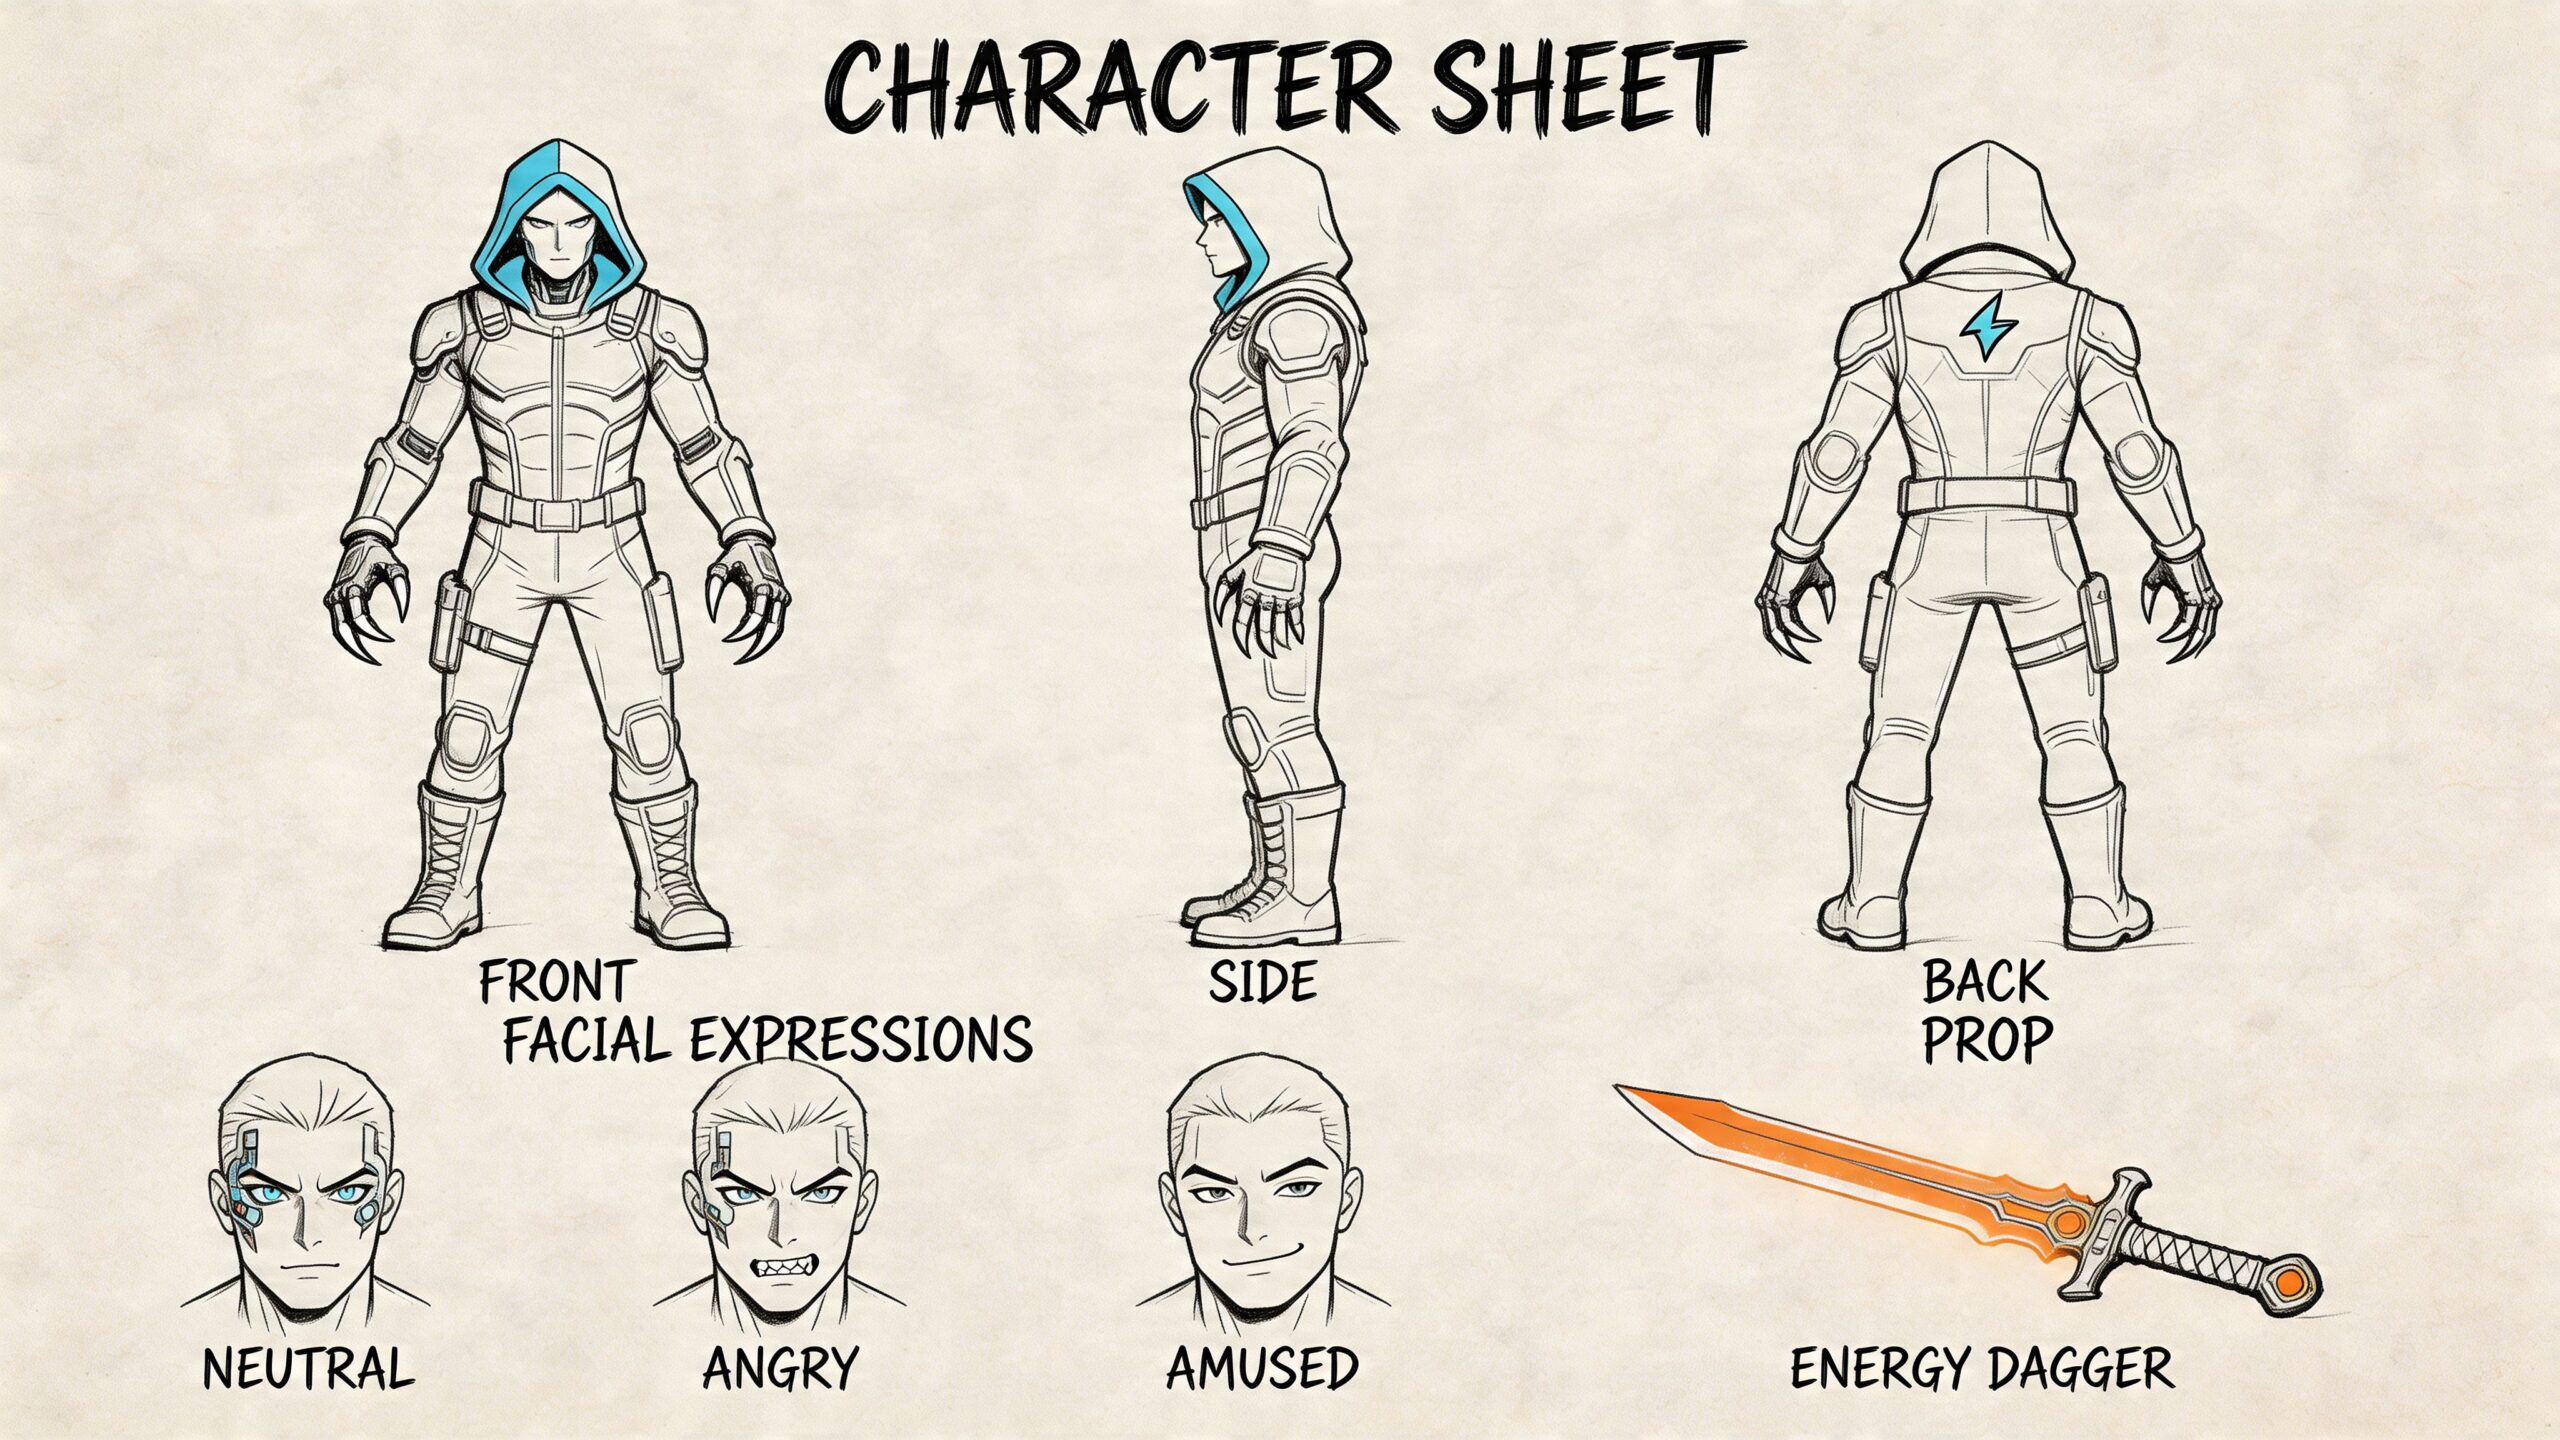
A character sheet solves hidden problems
Before drawing full scenes, make a character sheet.
Include:
- front view
- side view
- back view
- two or three expressions
- a neutral standing pose
- one action pose
- key props
That sheet exposes weak spots quickly. You’ll notice if the hairstyle only works from one angle or if the costume makes no sense from the back.
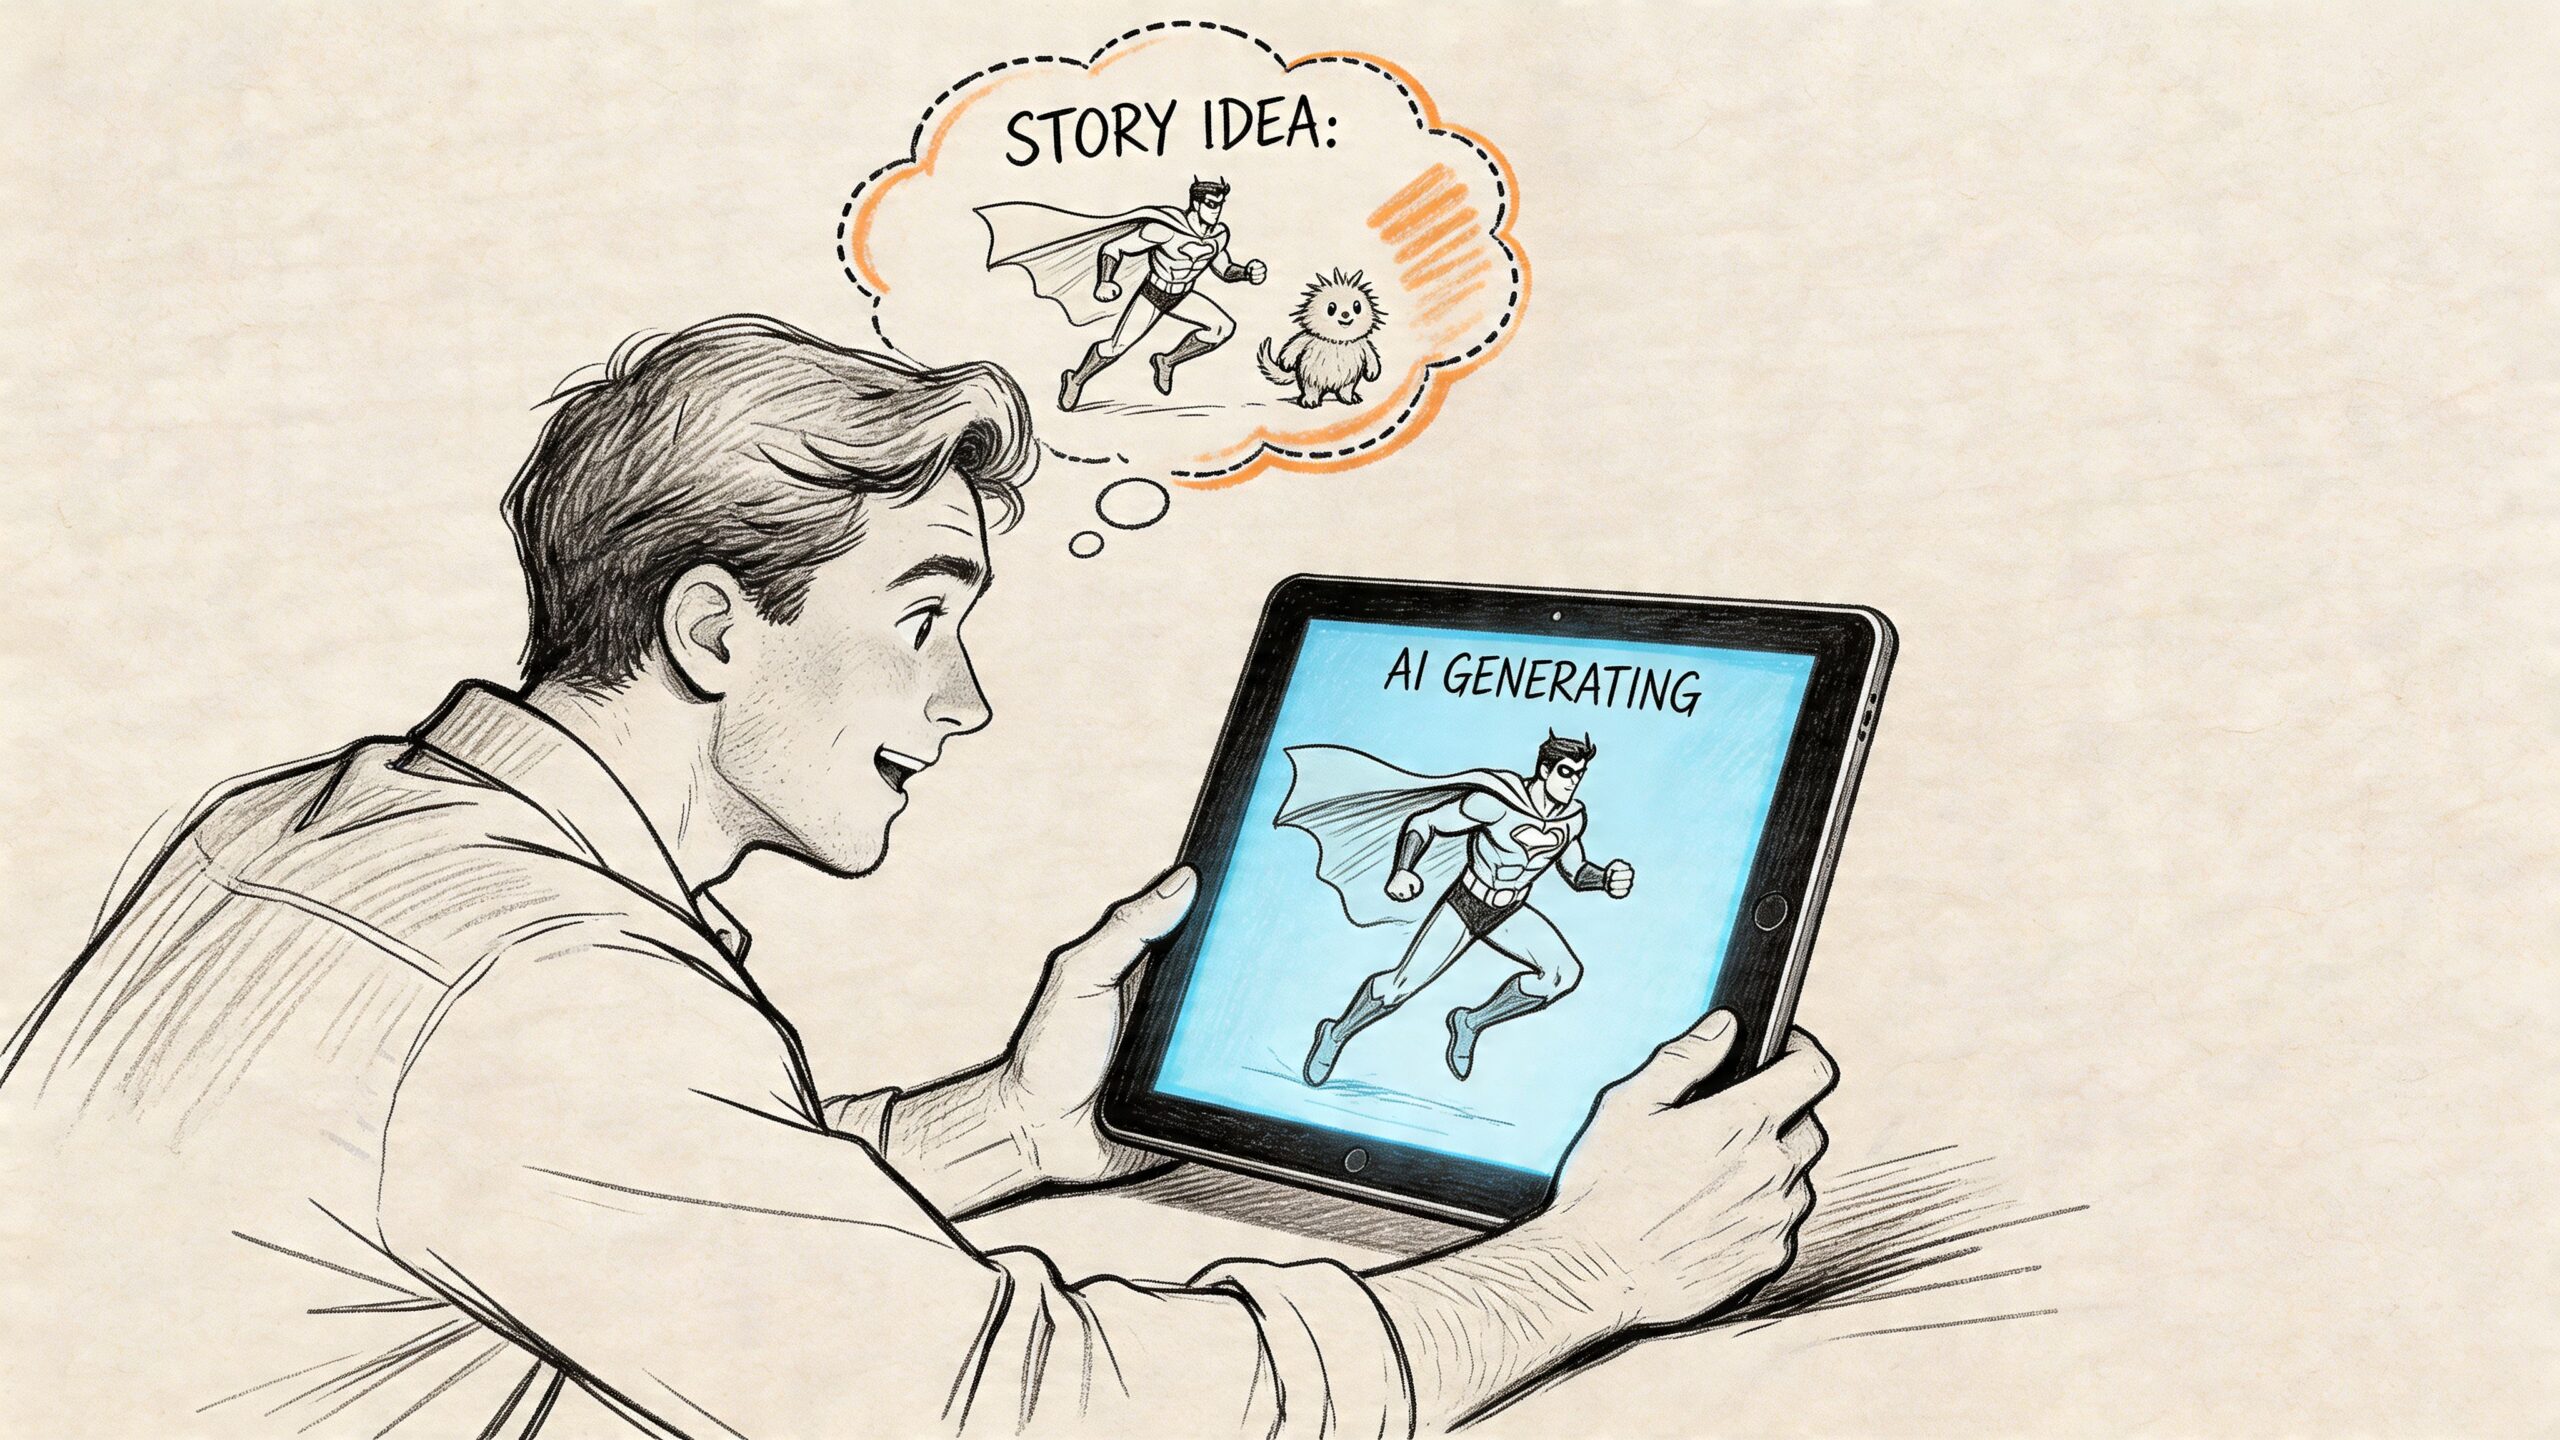
Skip the Sketchbook Use AI for Character Creation
Not everyone who wants a comic character wants to become a figure artist. Some people want to make a birthday comic, turn a friend into a manga hero, or test a story idea without spending months on anatomy drills.
That’s a real creative need, and traditional tutorials often miss it.
Non-artists have been underserved
A lot of online advice assumes you can already draw. It tells you to practice gesture, study anatomy, and sketch from life. That’s useful if you want drawing skill. It’s less useful if your goal is to create a comic character from an idea or a photo.
That gap is getting bigger. Google Trends data cited in this discussion of comic character drawing gaps shows a 45% year-over-year rise in “AI comic generator from photo” queries in 2025, yet many top results still focus on traditional drawing guides.
That tells you something simple. A lot of people want comic-style results without starting from a blank page.
AI is a different workflow, not a lesser one
There’s still resistance around AI in art conversations. Some people treat it like a shortcut that invalidates creativity. I don’t agree.
If you write the concept, choose the visual direction, refine the character, and shape the story, you’re still making creative decisions. You’re just using a different production method.
That can be useful for:
- Writers: testing character looks before hiring an artist
- Parents and gift makers: turning family members into comic heroes
- Content creators: building stylized visuals for posts, videos, or merch concepts
- Beginners: learning what they like before committing to years of practice
The biggest benefit is consistency
One of the hardest parts of comics isn’t the first drawing. It’s drawing the same character again and again from different angles, in different lighting, and across multiple scenes.
AI-assisted workflows can help with that, especially when the goal is story production rather than raw draftsmanship. They can also help when you want to start from real faces. That’s a huge advantage for autobiographical comics, gifts, classroom projects, and concept pitches.
For readers who want to explore that route, this example guide on how to turn photos into comic book art shows what photo-based comic styling can look like in practice.
A tool isn’t cheating when it helps you make the thing you otherwise wouldn’t make at all.
You can combine both paths
Things become interesting. Traditional drawing and AI don’t have to compete.
You can:
- generate a character from a photo or text idea
- use that result as reference
- redraw it in your own style
- build expressions, poses, and pages from there
Or do the opposite. Sketch your character by hand, then use AI to test costume variants, moods, or alternate styles.
That hybrid process can save time and loosen creative bottlenecks. It also helps people who are strong in story but weak in draftsmanship keep moving.
From Practice to Published Pages Your Next Steps
Many aspiring artists stall because they aim too big too early. They don’t need one character sketch. They want a whole series, a perfect cast, and a finished first issue. That kind of pressure kills momentum.
Start smaller. Finish tiny things.
Three low-pressure exercises that work
Try one of these this week:
- Thirty-second gesture rounds: Draw fast action poses from memory or reference. Focus only on movement.
- Expression page: Draw one head six times with different emotions.
- One-page micro scene: A character enters, reacts, and leaves. Keep it simple.
These exercises build the exact muscles comic artists use. Clarity, repetition, and decision-making.
Solve consistency before it frustrates you
A lot of beginners don’t realize consistency is a separate skill. They think if they draw one good head, they’ve solved the character. Then page two arrives and the face changes.
Recent Reddit data cited in this article on comic drawing workflows found that 62% of 1,200+ posts about comic character drawing named inconsistent designs as the top frustration. The same source notes that AI tools can help enforce consistency across plots, panels, and physical prints.
Whether you draw by hand or use newer tools, the lesson is the same. Save reference. Keep character sheets. Reuse your own visual decisions.
Make something finishable
Good first projects include:
- a fake comic cover
- a three-panel joke
- a one-page fight
- a short scene introducing one hero and one problem
You’ll learn more from finishing one page than from endlessly reworking a single face.
If you want a story-first route instead of drawing everything yourself, it’s worth exploring examples of personalized comic books to see how people turn memories, gifts, and ideas into complete pages.
The important part is starting while your excitement is still warm.
Common Questions About Drawing Comic Characters
Do I need to master anatomy before drawing comics
No. You need enough anatomy to build believable figures. Comics are stylized by nature. Strong gesture, clear proportions, and consistent construction matter more than memorizing every muscle.
What should beginners use, pencil or digital tools
Use whatever removes friction. A cheap sketchbook and pencil are enough. A tablet can also be great if digital makes you practice more often. The best tool is the one you’ll keep using.
How do I find my own comic style
Don’t hunt for style directly. Build it by drawing lots of characters, studying artists you love, and noticing your repeated choices. Your style usually appears as a byproduct of taste plus practice.
Why do my characters look different in every panel
Because consistency is its own skill. Make a model sheet, keep head shapes simple, and reuse landmarks. If the nose, jaw, and eye spacing stay stable, the character will hold together much better.
How do I draw action poses without making them stiff
Lead with the line of action. Push the pose farther than feels comfortable. Then build the torso, pelvis, and limbs on top of that movement. If you start with details, the energy usually dies.
Can I make comic characters if I can’t draw well
Yes. You can still create character concepts, write scenes, build reference boards, work with templates, or use AI-assisted tools to turn your ideas into visuals. Drawing skill is one path into comics, not the only path.
If you want to turn ideas or photos into a polished comic without drawing everything by hand, PersonalizedComics is a practical place to start. You can create fully illustrated pages in multiple art styles, keep characters visually consistent, and use four free credits to make your first comic.